Scoliosis Physio
Scoliosis Physio
By Aaron Woolley, Physiotherapist.
Continuing with the Robina Physio blog series, we shift our focus to an equally significant but often misunderstood condition: scoliosis. Scoliosis physio presents its unique challenges and more often than not requires a specialised approach of physiotherapy management.
Spinal Anatomy
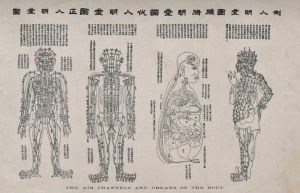
Before we take the deep dive into scoliosis physio it’s important we understand normal spinal anatomy. The human spinal column is typically composed of 33 vertebrae, categorised into several distinct regions. This structure includes 24 individual vertebrae, along with 9 fused vertebrae forming two separate regions at the base.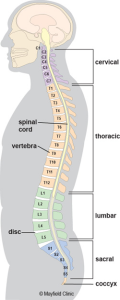
Specifically, the spine consists of:
- Cervical Vertebrae: The uppermost section, comprising 7 cervical vertebrae.
- Thoracic Vertebrae: Following the cervical region, there are 12 thoracic vertebrae.
- Lumbar Vertebrae: Below the thoracic region, 5 lumbar vertebrae are located.
- Sacrum: This is a fusion of 5 vertebrae, forming a single structure.
- Coccyx: Commonly known as the tailbone, typically involving 4 fused vertebrae.
Variations in this structure are possible, including conditions like hemi-vertebrae and fusion of vertebrae in regions outside the sacrum and coccyx.
In terms of spinal curvature, when viewed from the side, the vertebral column in an upright posture reveals five distinct curves:
- Cervical Curves: There are two curves in the cervical spine. The upper cervical curve stretches from the base of the skull (occiput) to the second vertebra (axis), curving convexly forward. Conversely, the lower cervical curve, which is lordotic, extends from the axis to the second thoracic vertebra, curving in the opposite direction of the upper curve.
- Thoracic Curve: This curve spans from the second to the twelfth thoracic vertebrae (T2 to T12), and is concave forward. This concavity results from the posterior parts of the vertebral bodies being deeper in this region. Additionally, a slight lateral curve is often present in the upper thoracic area, with the convexity directed either to the right or left.
- Lumbar Curve: Extending from the first lumbar vertebra (L1) to the junction where the lumbar spine meets the sacrum, this curve is convex forward.
- Sacral Curve: This curve, which includes the sacrum, extends from the lumbosacral junction to the coccyx. It is characterised by a forward and downward facing anterior concavity.
Understanding Scoliosis
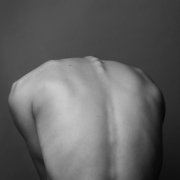
Scoliosis is a condition characterised by an abnormal lateral (sideways) curvature of the spine. It can occur in children and adults, but it is most commonly identified in adolescents. The curvature can vary in degree, and in some cases, it may be accompanied by a rotation of the spine, leading to a more complex three-dimensional deformity. Scoliosis affects 3% of the population and is more prevalent in females. The severity of the condition ranges from mild to severe, resulting in a diverse array of treatment options. Notably, females have an eightfold increased risk of developing a degree of curvature that requires medical intervention. At Robina Physio on the Gold Coast our Physiotherapists are experts with a deep understanding of the human spine and conditions affecting its function.
Causes and Types of Scoliosis
The exact cause of scoliosis is often unknown (idiopathic), particularly in adolescents. However, some cases are attributed to congenital spinal deformities, neuromuscular conditions, or trauma. Scoliosis can be broadly categorised into three types:
- Idiopathic Scoliosis: accounts for approximately 80% of scoliosis diagnoses, identified by the process of excluding other potential causes. The designation ‘idiopathic’ implies that the underlying cause of the condition remains unknown.
- Congenital Scoliosis: arises during embryonic development, leading to the malformation of one or more spinal vertebrae. This can happen at any point along the spine and is due to disparities in growth rates within different sections of the spinal column, resulting in curvature and other spinal deformities. Since these irregularities are present from birth, congenital scoliosis is often discovered earlier than idiopathic scoliosis.
- Neuromuscular Scoliosis: is a form that develops as a consequence of underlying neurological or muscular disorders, such as spinal muscular atrophy, cerebral palsy, and spina bifida. This variation of scoliosis tends to progress more swiftly than idiopathic scoliosis and frequently necessitates surgical intervention.
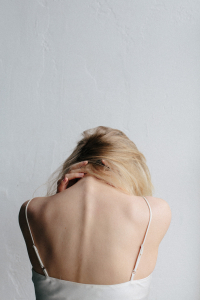
Signs and Symptoms
For many scoliosis is more of an aesthetic issue, but it can also lead to physical discomfort and impact overall health. Common signs include:
- Visible curvature of the spine
- Uneven shoulders or hips
- Rib prominence or a prominent shoulder blade
- Back pain or discomfort
- Fatigue due to muscle strain
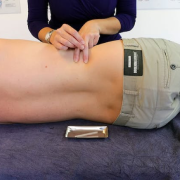
Diagnosis and Assessment
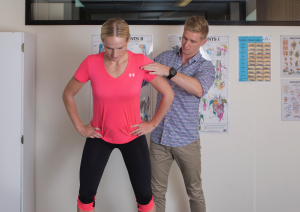
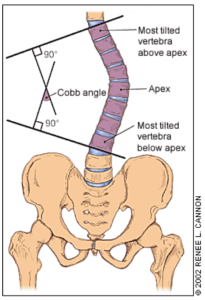
Diagnosis typically involves a physical examination, including the Adam’s Forward Bend Test, and imaging tests like X-rays to determine the curvature’s angle (Cobb Angle). In physiotherapy, a comprehensive assessment is crucial to tailor the treatment effectively. This assessment may include:
- Evaluating the spine’s range of motion
- Muscle strength testing
- Postural analysis
- Assessing breathing patterns and lung capacity
Physiotherapy Management
The role of physiotherapy in managing scoliosis is pivotal. While severe cases may require more intensive treatments such as bracing or surgery, many individuals with scoliosis benefit significantly from conservative interventions.
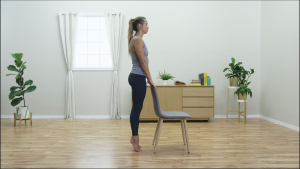
- Exercise Therapy: Specific exercises are designed to strengthen and stabilise the muscles supporting the spine. This includes strengthening the core, improving posture, and specific stretching exercises to help counter the curvatures pulling.
- Manual Therapy: Techniques like soft tissue mobilisation and spinal manipulation can help alleviate pain and improve spinal mobility. Unfortunately, those with scoliosis have a higher prevalence of back pain. This can be managed well expert physio care similar to that provided at Robina Physio on the Gold Coast.
- Postural Training: Educating patients on maintaining proper posture during daily activities is crucial in managing scoliosis. It is very common for people with scoliosis to experience other structural/functional changes including winging scapula and forward head posture.
- Bracing and Support: In some cases, particularly in growing children and adolescents, bracing might be recommended. Some studies have shown it may help to prevent the future progression of the curve in some patients. The downside is the brace typically needs to be worn 23 hours per day.
The majority of scoliosis cases are only mild with Cobb angles less than 20 degrees and will be managed with observation and physiotherapy. Once angles start to get between 30-40 degrees intervention such as bracing may be considered for some depending on their age. Only once Cobb angles to a more severe level of 40-50 degrees is surgery then considered.
Other than surgery no interventions has been proven to improve a patient’s spinal curvature. But conservative interventions have been shown to be useful in minimising pain and curvature progression. Although it’s important to note that improving the curvature angle doesn’t necessarily mean an improvement of pain and/or function. Therefore, you should take careful consideration when deciding on which treatment path to take.
At Robina Physio on the Gold Coast our Physiotherapists work in conjunction with your GP and Orthopaedic specialist to ensure your and/or your loved get the highest quality care which is guided by the most up to date evidence-based treatments and advice.
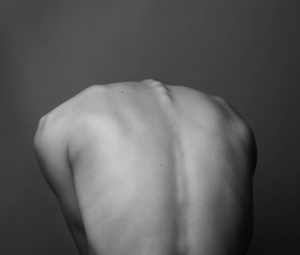
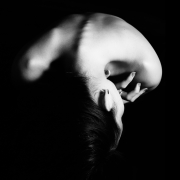
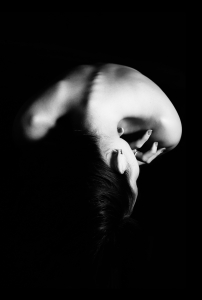
Photo by Inge Poelman
The Good News
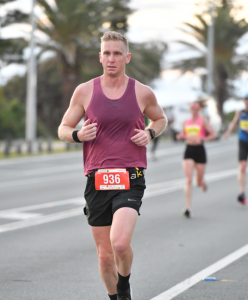
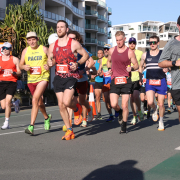
While scoliosis cannot always be prevented, early detection and intervention can significantly impact the progression and management of the condition. The vast majority to people with scoliosis have little to no symptoms other than the aesthetic appearance of the spine. Even people with larger curvatures still function normally without limitation, even at an elite sporting level. So overall don’t let a scoliosis diagnosis scare or dishearten you unnecessarily.
Scoliosis, much like TMJ dysfunction, requires a nuanced and specialised approach in physiotherapy. The goal is not just to manage the curvature of the spine but to enhance overall quality of life, ensuring individuals with scoliosis can lead active, healthy lives. At Robina Physio on the Gold Coast, our dedicated team is trained to provide comprehensive care for those dealing with scoliosis, offering support and tailored interventions every step of the way.
If you or someone you know is struggling with scoliosis, don’t hesitate to seek professional help. Early intervention can make a significant difference. Contact Us at Robina Physio on the Gold Coast or BOOK ONLINE to schedule a consultation and take the first step towards effective management of scoliosis.